
With vintage instruments, there’s simply no telling what patches and pokery you’re going to find under the hood. Good news! Dream Guitars is well-acquainted with those surprises, and we know just what to do when they crop up. Recently, a client and collector came to DG with several obscenely rare Martins, among them a 1930 OM-45 that he was concerned was too quiet. Once Paul Heumiller got his hands on the guitar, his ear told him something was definitely awry. Having played many of the “Holy Grail” Martins for the 20s and 30s, he’d expected to hear a energetic voice with vigorous projection, but this guitar sounded timid, with a bad case of congestion.
Paul immediately suspected that the bridge plate had been modified, and after plumbing the depths of the OM-45 with a flashlight and a mirror, his suspicions were confirmed: glued where the original bridge plate should have been was a massive (over 3″ wide) modified bridge plate! It was probably installed in an effort to combat the tendency of the top to belly up as the string forces enact continual upward stress for years, over-doming the top around the bridge. On the one hand, the girthy bridge plate worked perfectly: this more-than-80-year-old guitar had very little belly to its top, unheard of at its age. On the other hand, the voice was something between a Chevrolet sputtering tailpipe fumes and a cat mewling in the rain, the top’s vibrations were so severely dampened.

We assured our client that this was a problem that we could handle. Enter: Ken Jones, veteran of instrument restoration, who approached the repair with zeal as he prepared to remove the bridge. However, the situation was about to get more interesting, once the bridge was released. Underneath, where there should have only been a pale, unfinished Spruce top, there was a nasty black patch of Spruce and scaly epoxy. After repeated attempts to steam this patch free proved ineffectual (due to the epoxy’s high heat resistance), Elliot W. took chisel in hand and meticulously pared away the noxious epoxy with “surgical precision and the serenity of spirit that work of this caliber demands,” says Jones, finally releasing the Spruce patch.
 |
 |
 |
 |

What’s next on the agenda? Ken: “Cleaning up the inside of the top, making a smaller, thinner bridge plate, and using our belly-reducer cauls to further sweet-talk the top back into shape. I have no doubt this will improve the voice of this guitar. This is a really cool, fun, and interesting repair that reminds me why I got into repair work in the first place–keeping these old dogs going because they just sound better and better with age!” In addition to releasing the bridge, releasing the pickguard helped reduce the amount of belly dramatically, making us very confident that this top will settle down and behave beautifully, once we’re finished here.
 |
 |
 |
Stay tuned as we continue to make good on the original bad repair of this 1930 OM-45! If reading about the magic of instrument restoration strikes your fancy, just you wait: we’ve got more exciting repairs on our bench, and we’re itching to bring you along for a play-by-play.
Update: July 25, 2016
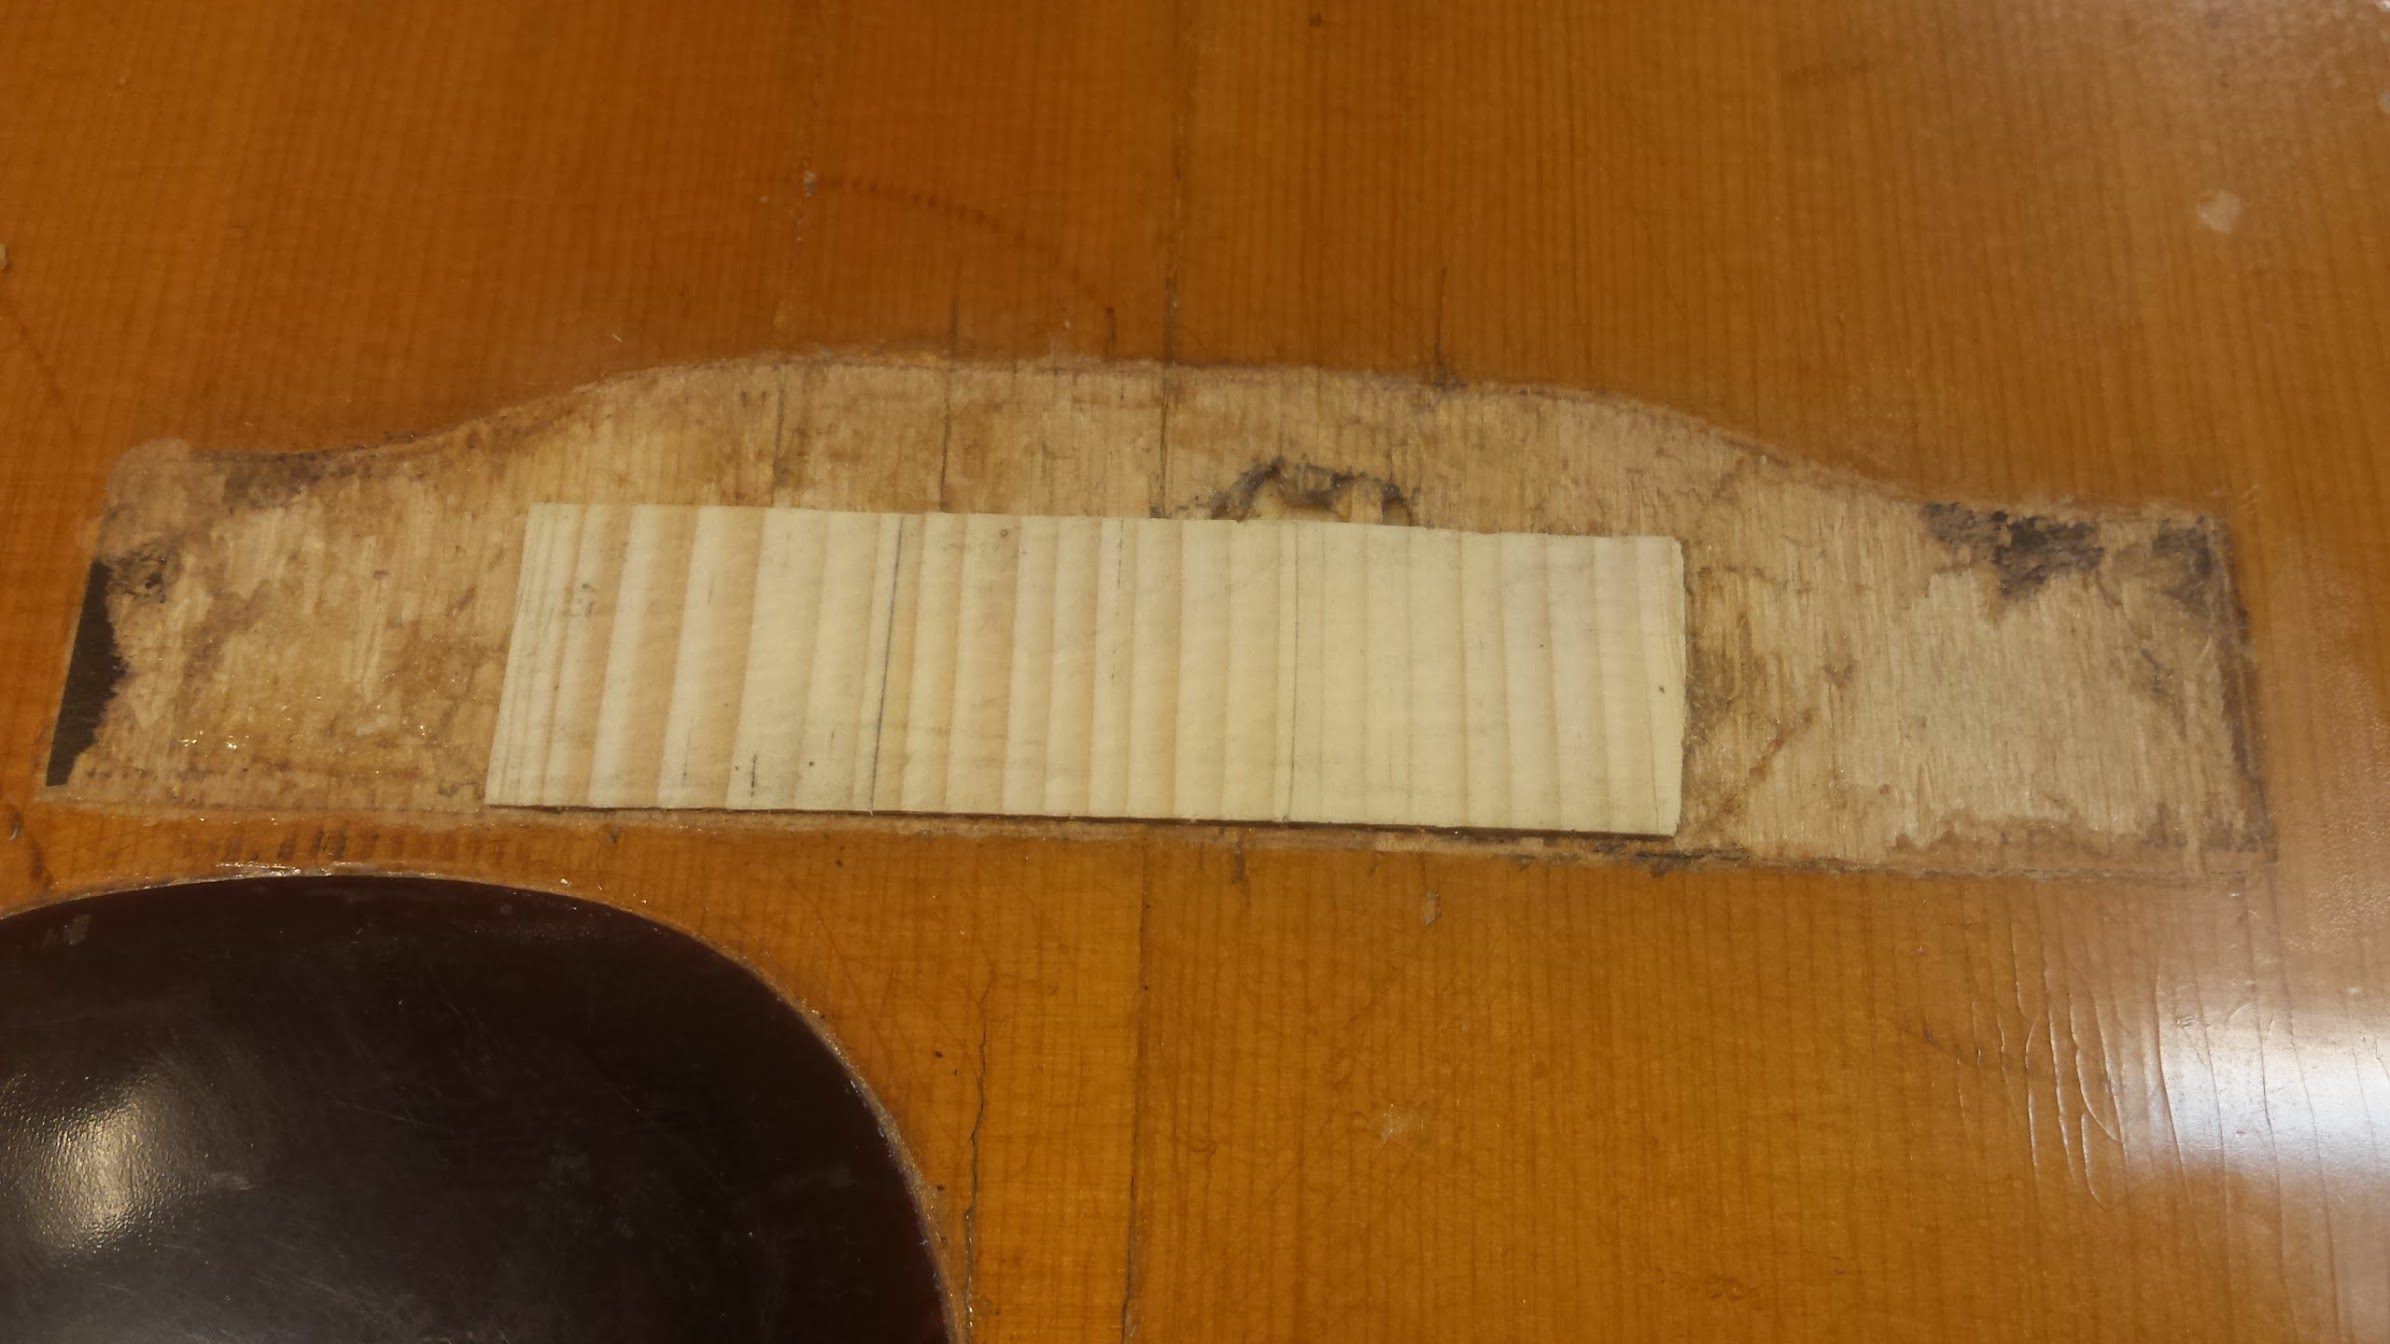
The last time we checked in, this 86-year-old Martin had been divested of a poorly-executed repair that was compromising its top, with the last of the lingering epoxy scraped clear and the massive bridge plate and patch removed.
Much has happened since then! After brainstorming and consulting with other maestros of the repair world, Ken Jones and our team have landed on an elegant solution to simultaneously reinforce the top, fill the rectangular hole between the bridge and the bridge plate, and create a consistent platform to reglue the original ebony belly bridge: combine the patch under the top with the plug into one patch-plug.
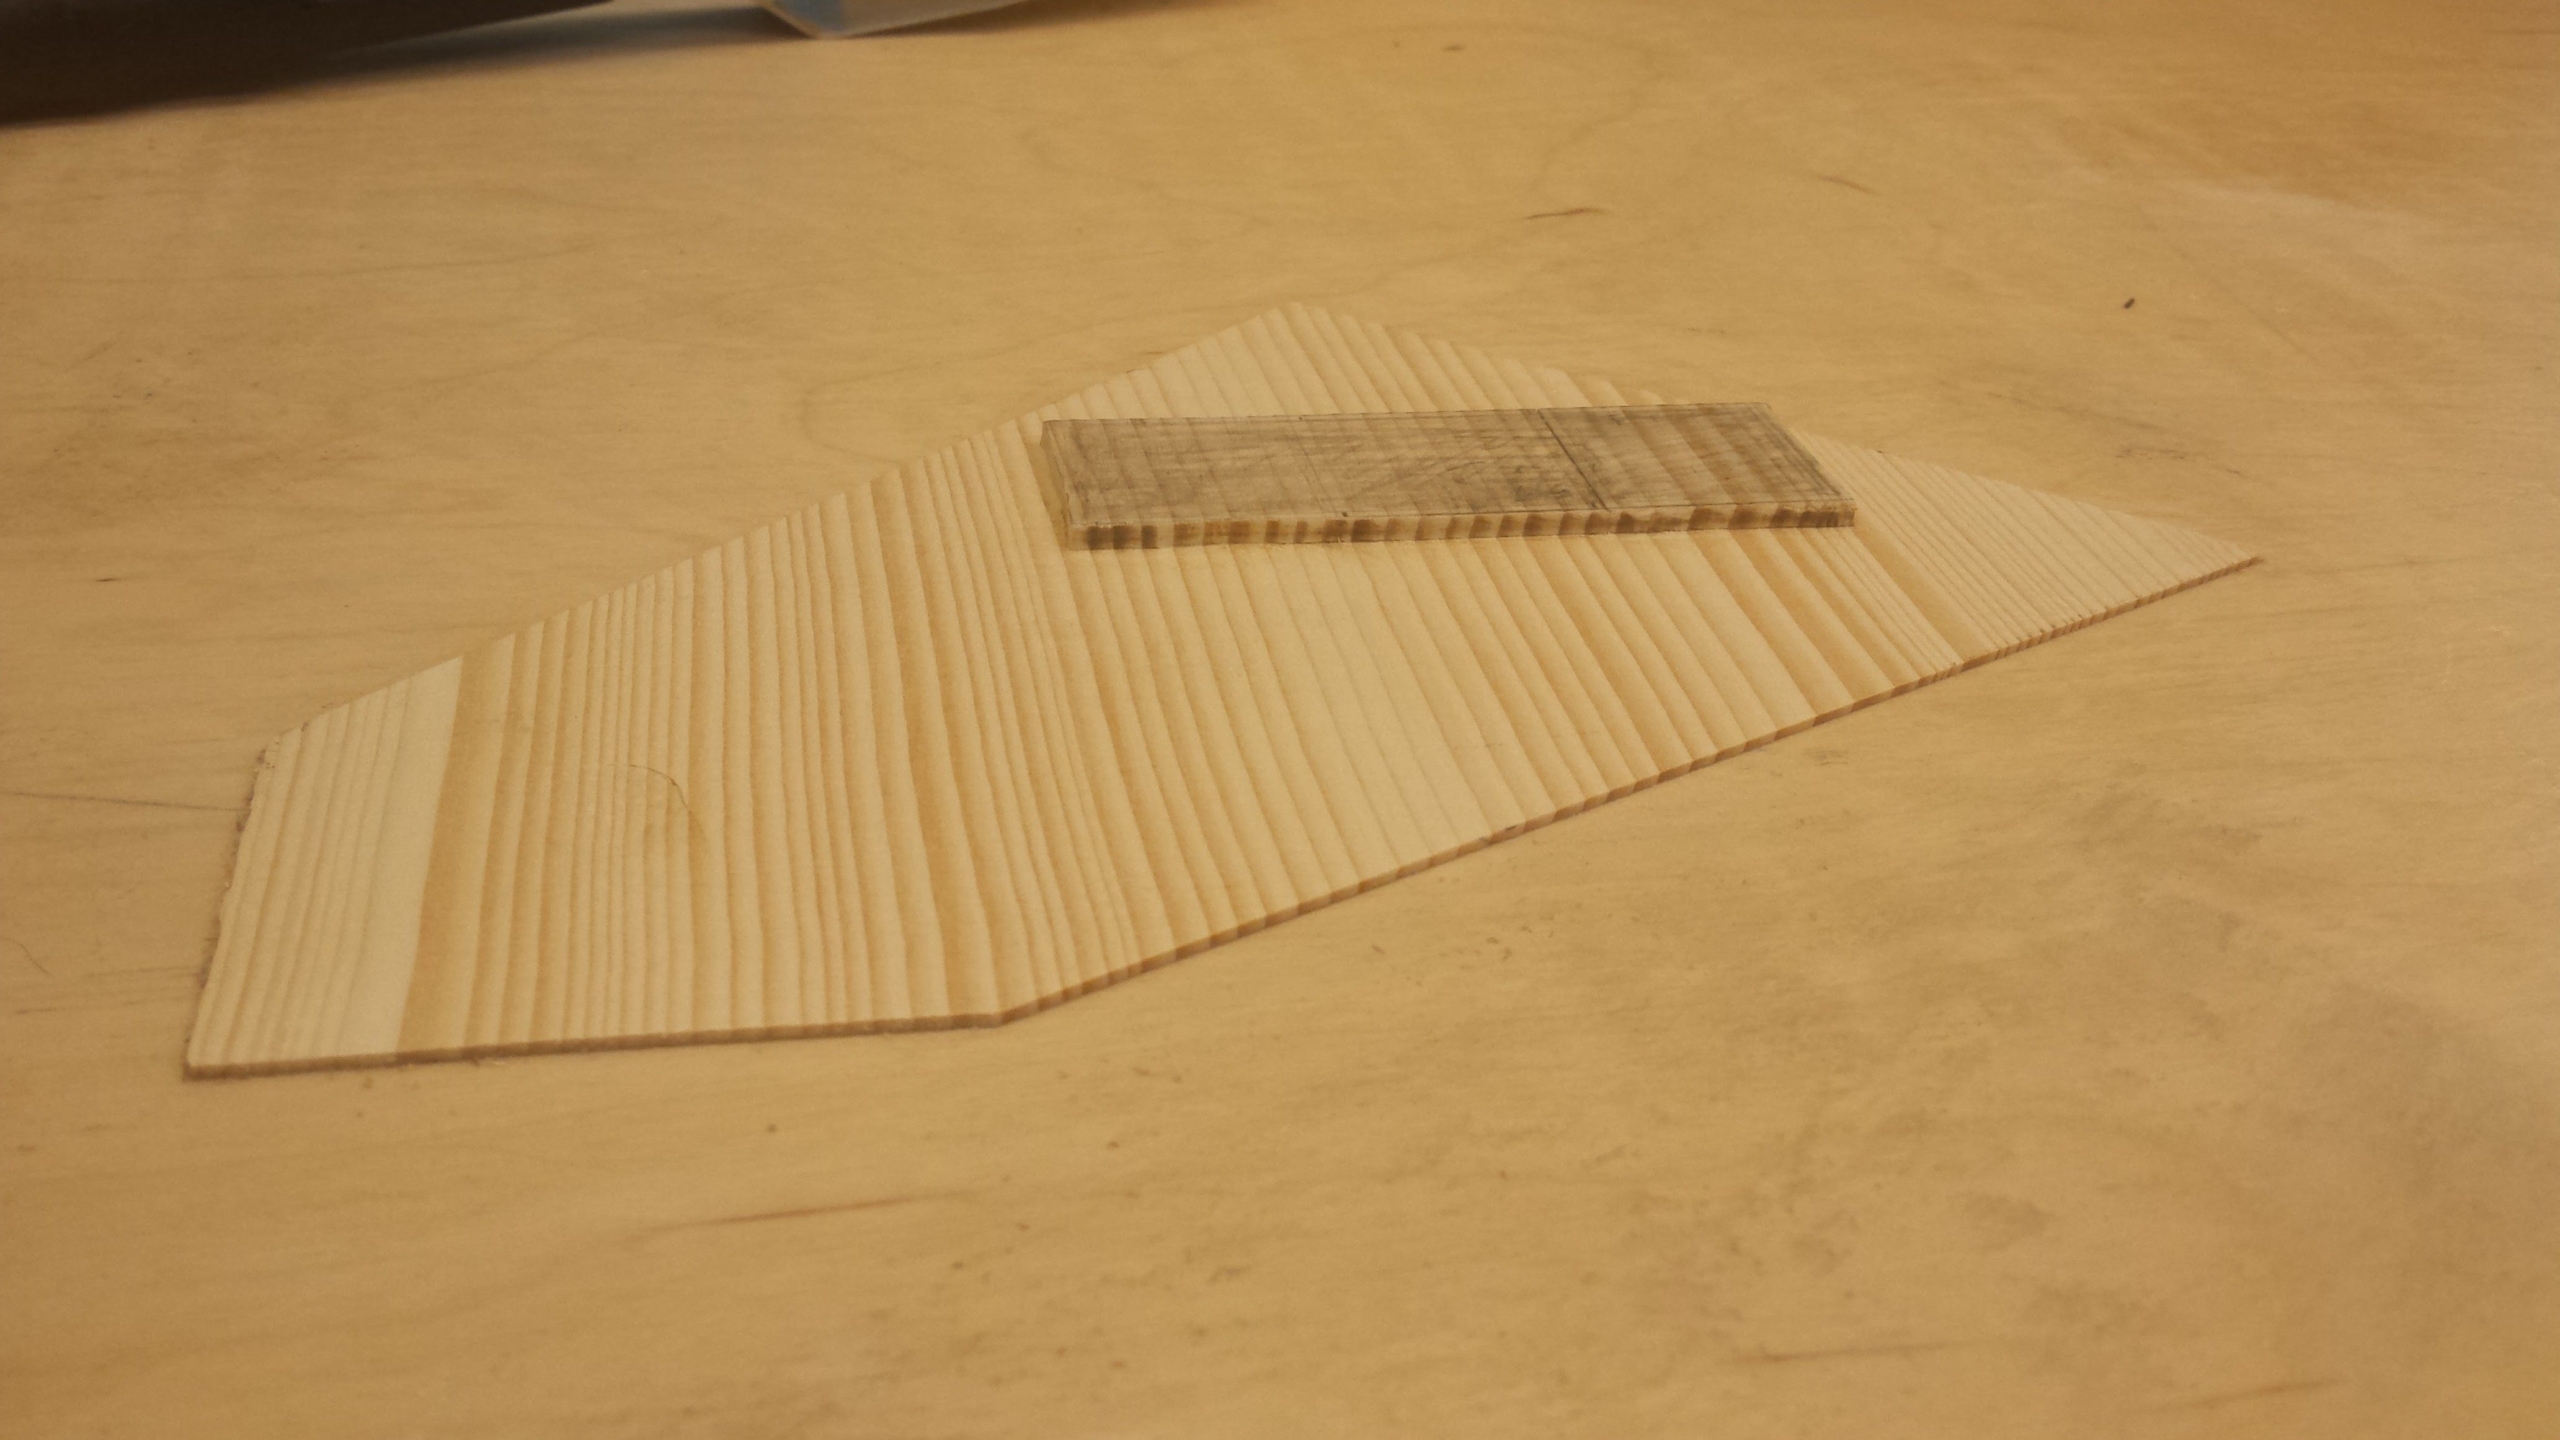
Spruce stock has been carefully trimmed to exactly fit inside the braces, then excess spruce has been routed away from the plug portion. The thickness of the top of the OM-45 is about .112″, so this piece was thicknessed to .168″ or 1.5x the thickness of the top.
Next, the thickness of the top (.112″) was routed away everywhere on the patch, except for where the patch will fill the hole in the top.
Before we could even consider starting on this exciting new leg of the repair, we first needed to patch the sections of the X braces where the previous colossal bridge plate was notched into them. If we hadn’t addressed those gaps, the top would have been at significant risk for further deformation. That finished, we then moved on to the spruce blank itself, shaped to fit between the newly-repaired X braces. The top of this Martin OM-45 is .112″, so the spruce blank was sanded to .168″, or one and a half the thickness of the top, so that, once installed, the plug would sit slightly proud of the surrounding top. After transferring the shape of the rectangular hole in the top between the bridge and bridge plate to the blank, we then carefully routed the surrounding material until the “plug” part of the patch was .168″, and the surrounding spruce was .056.
Then, the location of the bridge plate was marked out on the underside of the patch, and the patch was then sanded from that point of contact to paper-thinness at its edge to minimize mass and allow the original top to vibrate as freely as possible without jeopardizing its structural integrity.
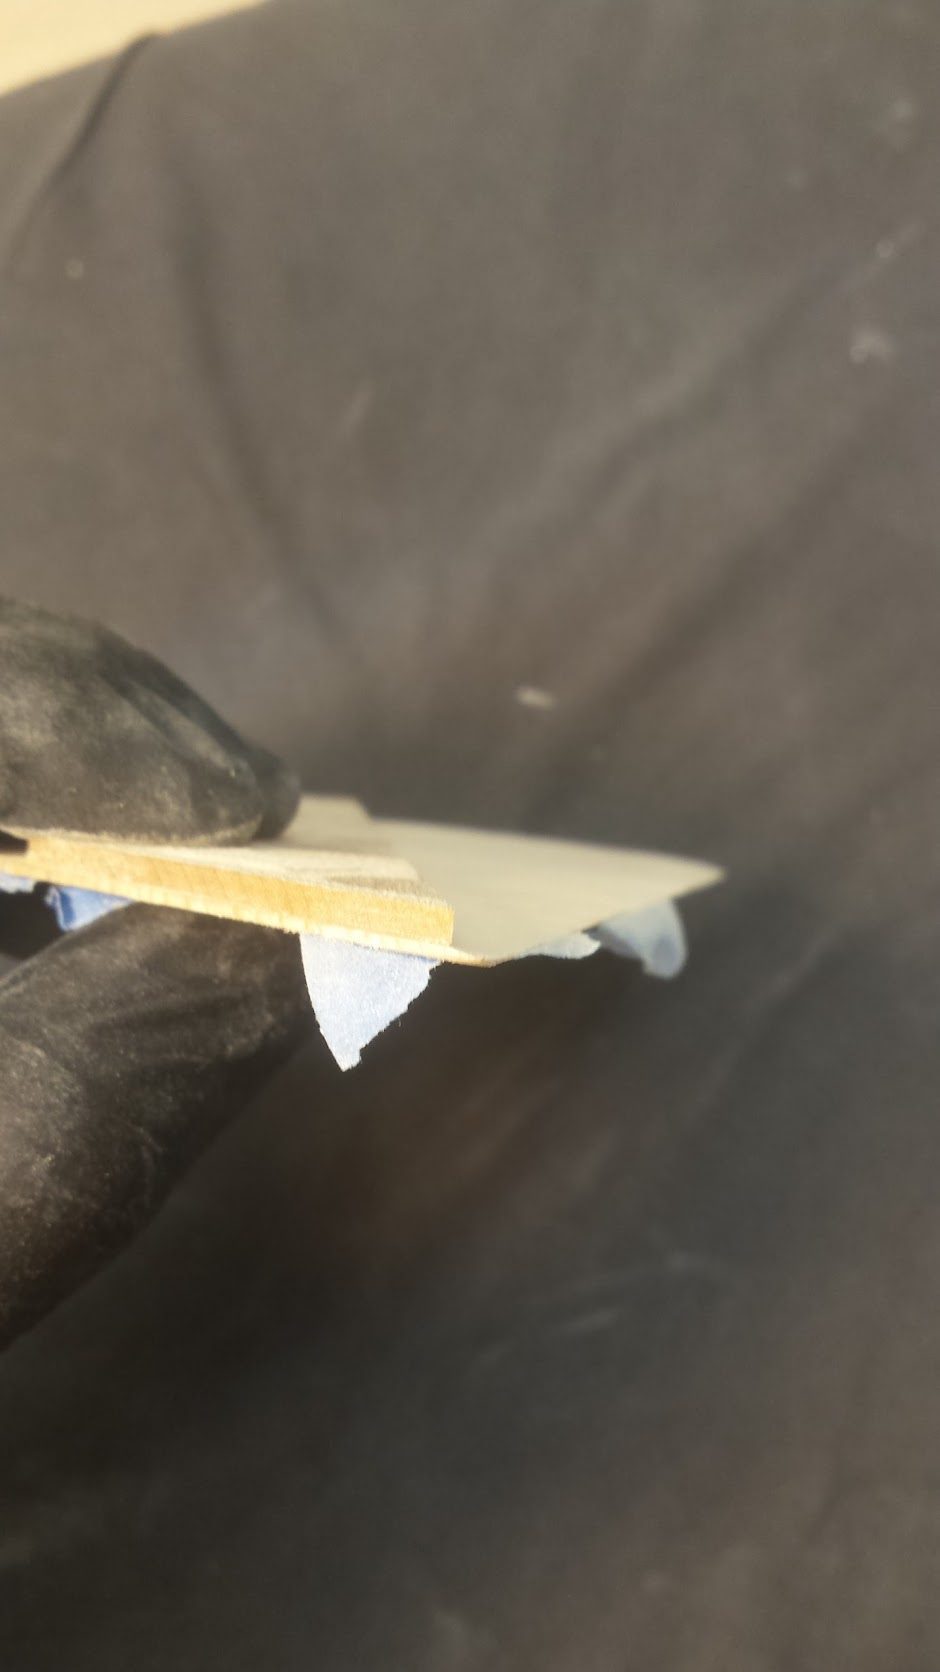
An edgewise view of the tapered back end of the spruce patch.
After looking at these photos, you might be asking yourself, “Why is that thing so wide?” The patch-plug has a large surface area in order to increase the amount of gluing area for the patch-plug, meaning that the patch-plug is glued to the underside of the top in addition to being glued to the end-grain of the sides of the rectangular hole left by the previous repair. By itself, an end-grain glue joint is inherently weak. However, with the additional gluing force of the lower section of the patch against the underside of the spruce top, we’re confident that this new patch-plug won’t pull up, which was the problem with the epoxied patch from an earlier repair which we had chiseled out. The large surface area of the patch-plug also provides a little more reinforcement to combat the bellying that was present when the OM-45 first appeared on our bench.
The patch-plug was then carefully scored partway along spring growth grain lines (which are softer) and broken into three pieces that equally divided the plug in order to fit into the soundhole, with blue tape on the back to act as hinges.
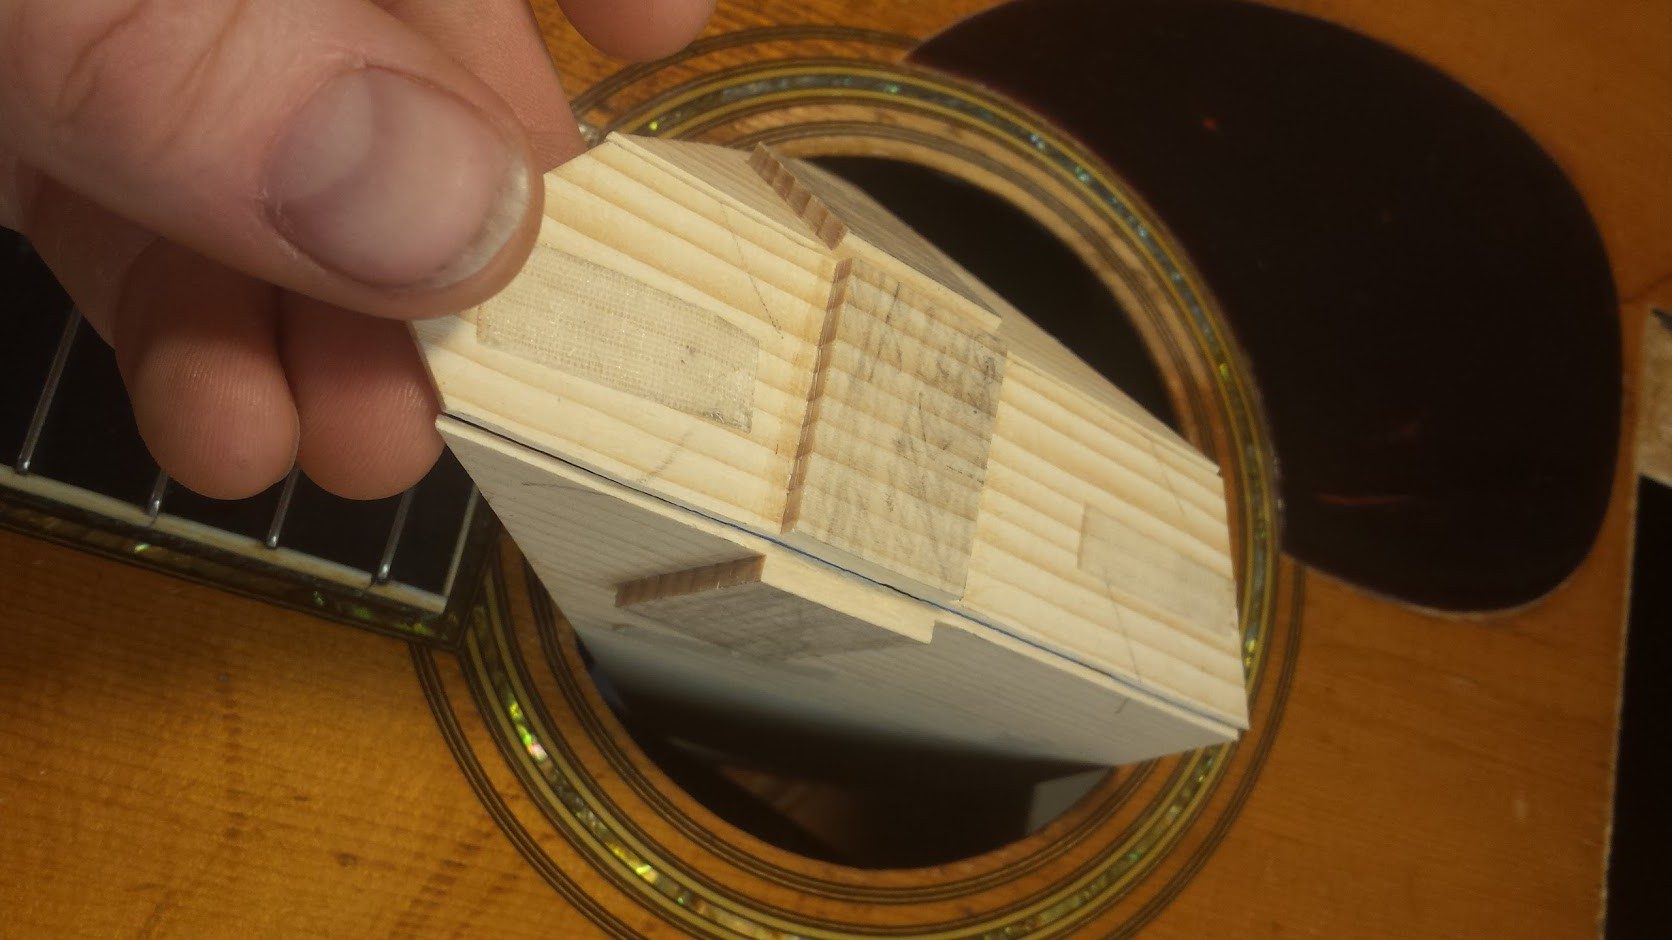
The “top” or the non-show side is scored about halfway through the patch with a sharp blade The score lines are in the soft, spring growth grain. Next, it is broken along those score lines. This is to prevent a seam from showing inside the guitar once it is in place. Also, a break will help register all three pieces together cleanly inside.
The moment of truth came when we first folded the patch-plug and eased it into the soundhole before pressing it into place between the X braces. Turns out: a perfect fit.
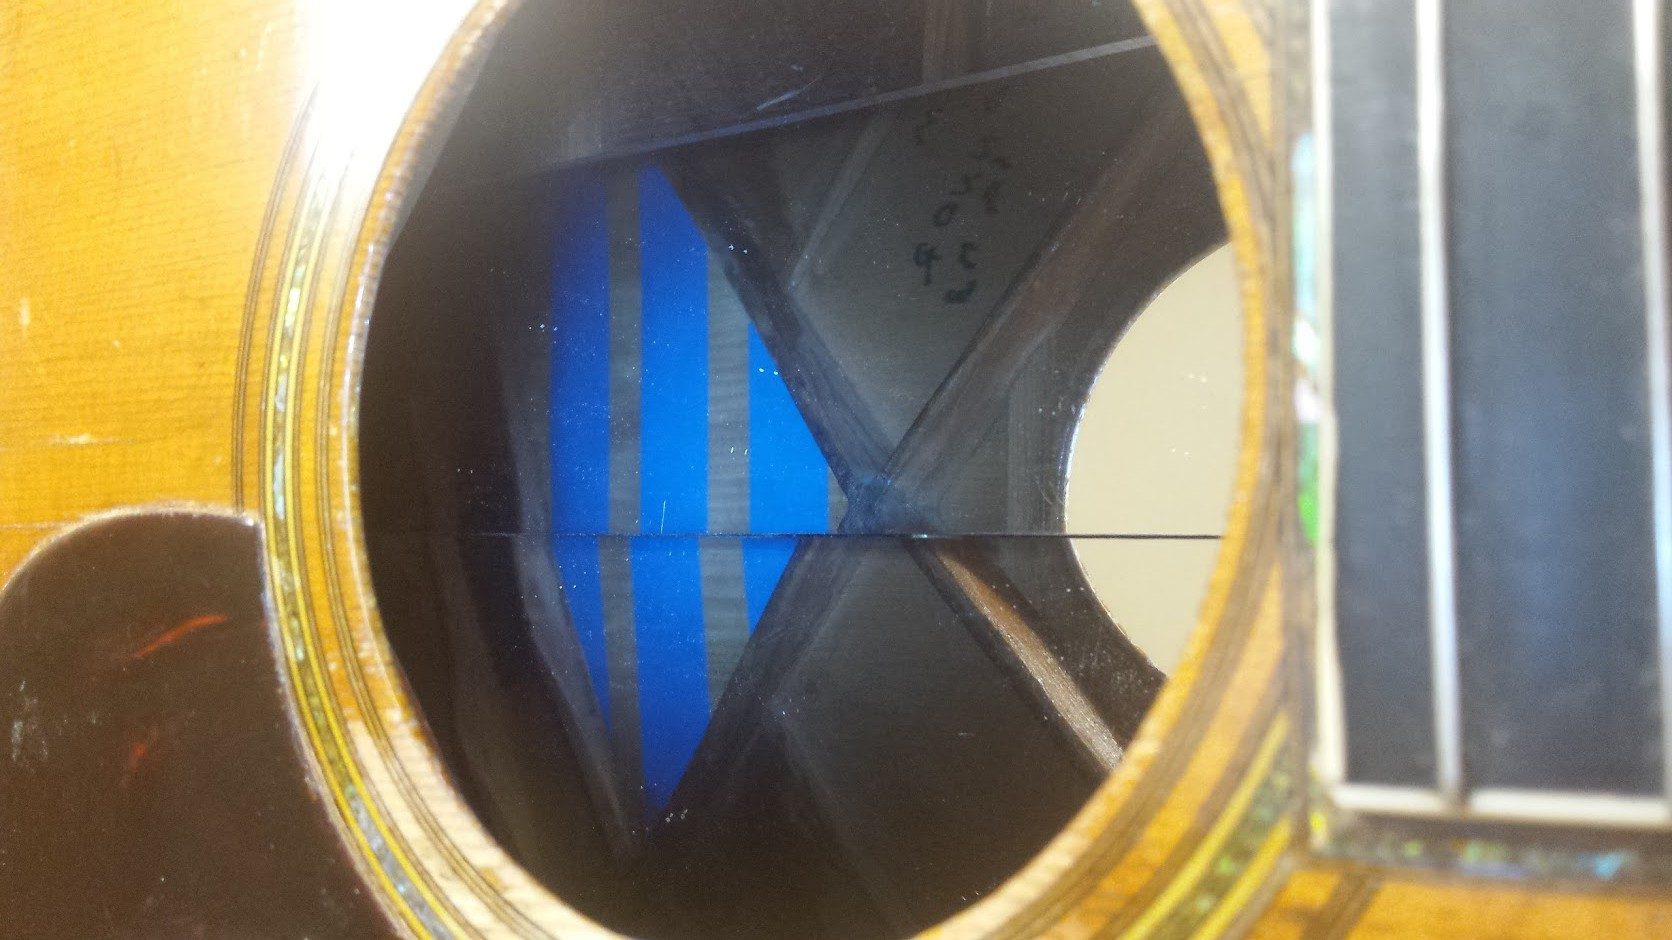
So snug, it will stay in place on its own without glue or tape!
Once we knew the dimensions of the patch-plug were exactly what we wanted, we then made several cauls for the top and bottom, and aged the new spruce patch-plug with Potassium Permanganate in order to make it blend in better with the surrounding 86-year-old spruce.
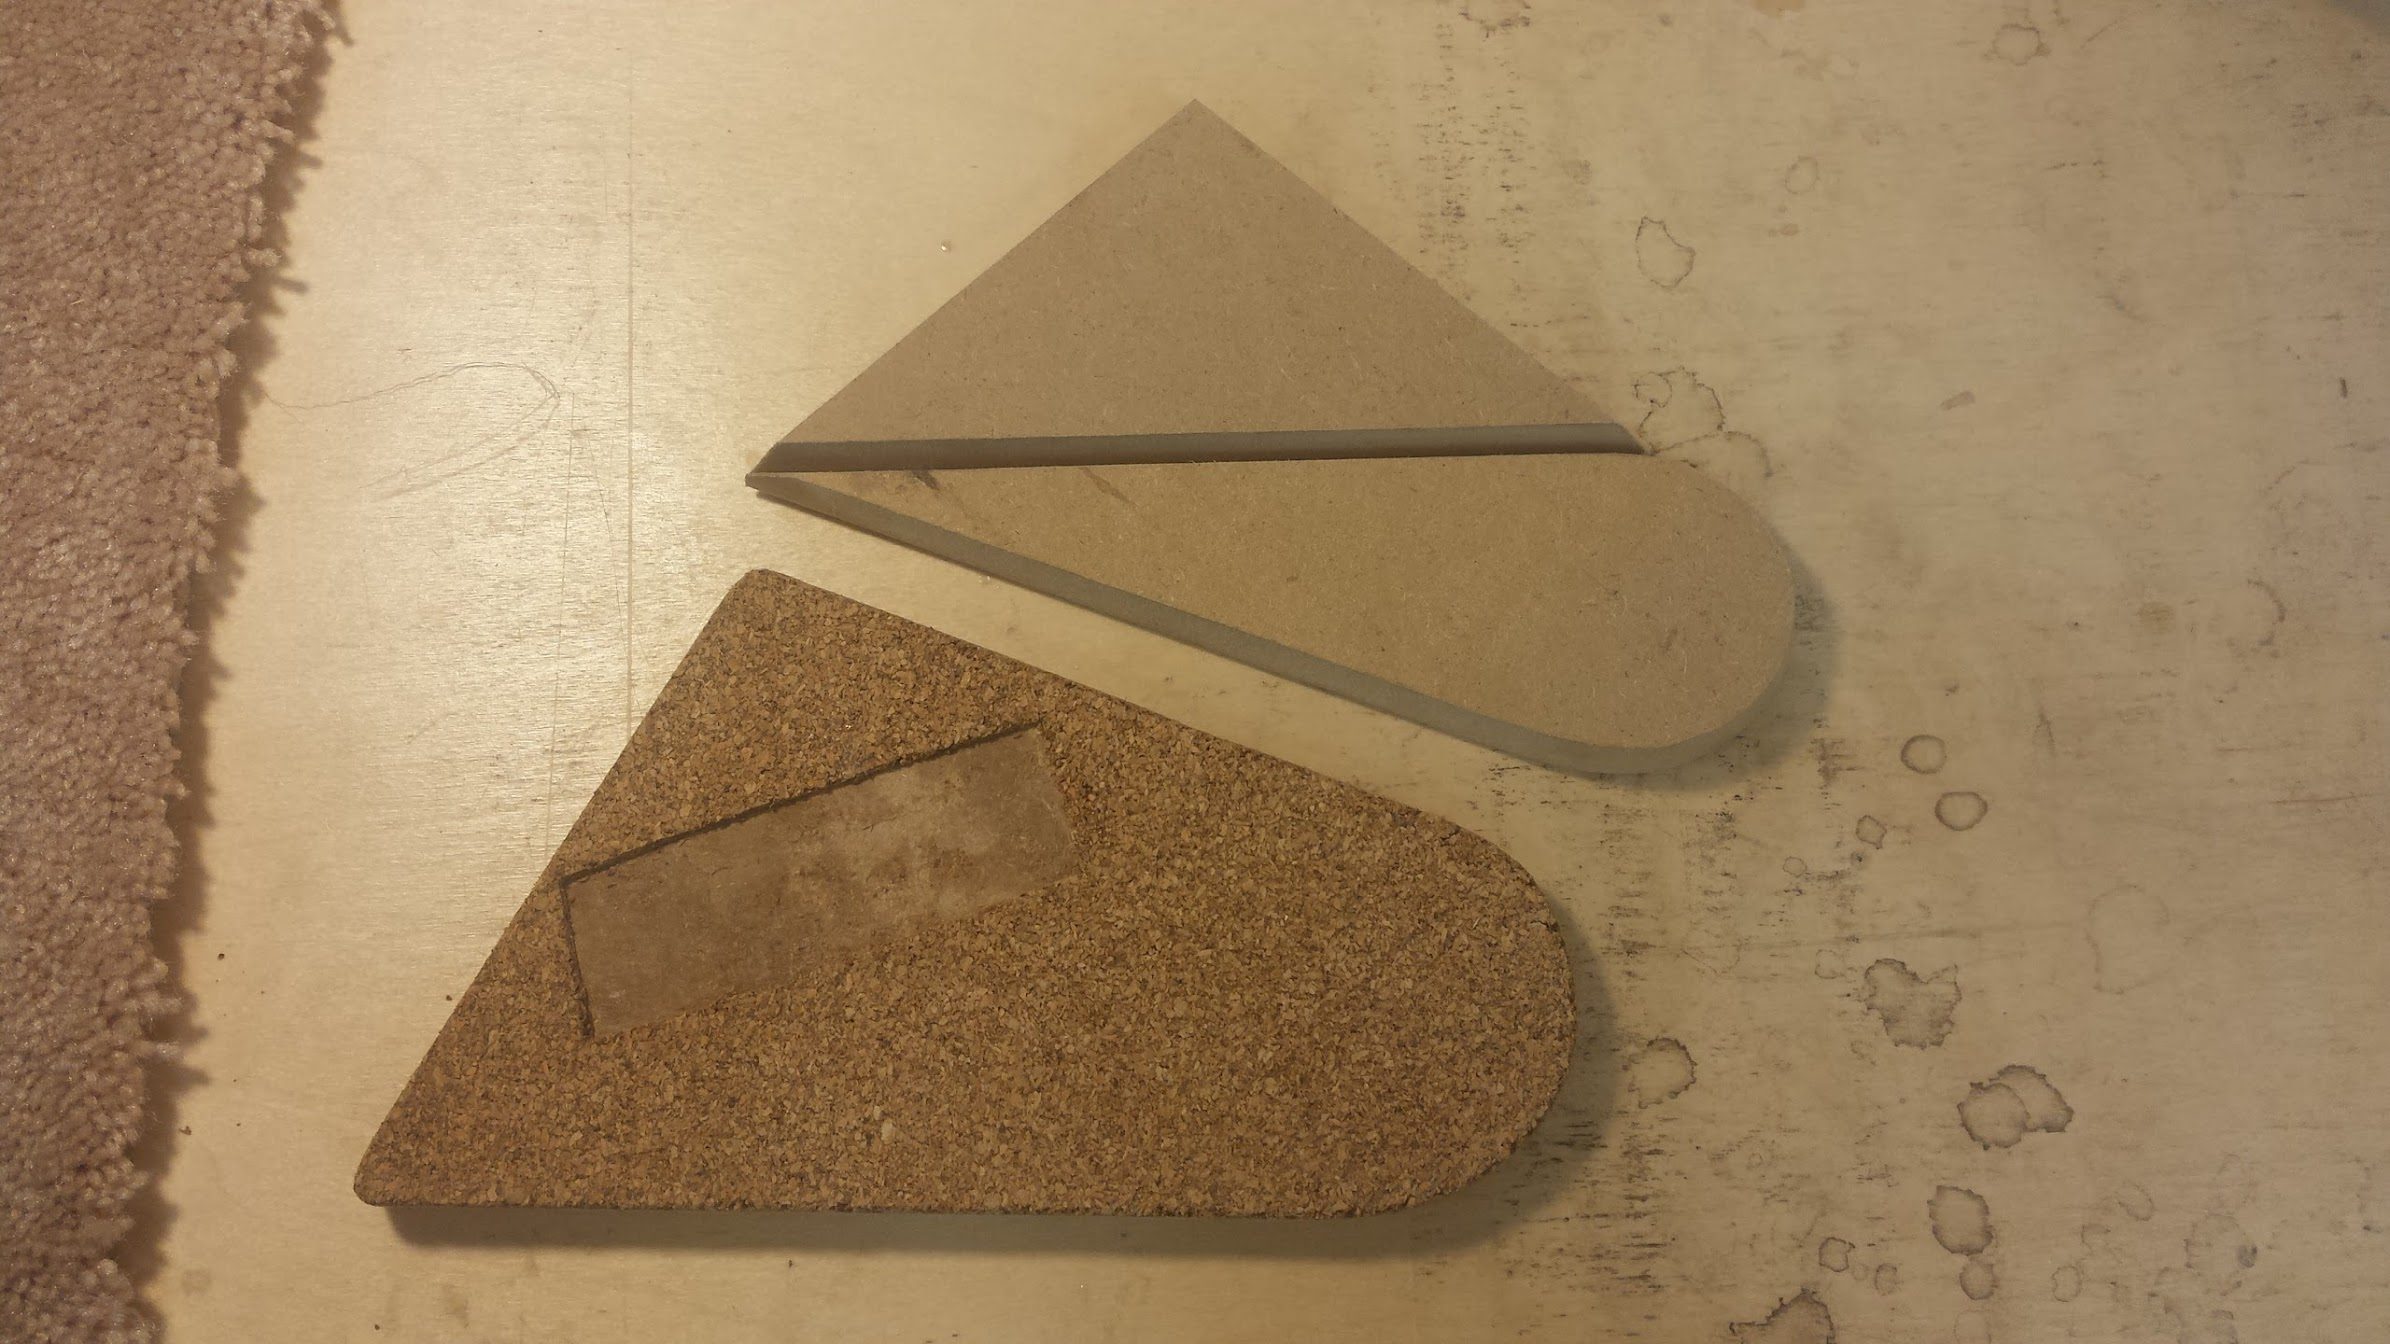
A special set of inside clamping cauls are mad to fit the patch.
Now, a test fit is all fine and dandy, but it’s another matter entirely when the moment of the actual glue-up arrives. This time, everything must to be perfect. In keeping with tradition, we used hide glue and several cam clamps and deep-throated C clamps with the cork-lined cauls to cement the patch-plug with the original top. Hot hide glue is absolutely essential for a repair of this nature, where even clamping pressure is key, and hide glue’s ability to pull the wood tighter and tighter together as it cures helps ensure that the joint is airtight and even. Moreover, hide glue is tonally superior to rubbery aliphatic resin-based glues–but this comes at a price: a very short working time. Thus, appreciate how cool-headed and savvy is our repair staff: we were able to evenly spread glue on the patch, fold the patch, get it inside the guitar through the soundhole, unfold it, put it into place, then precisely arrange three cauls and five clamps inside a tiny soundhole, working by feel, before the hide glue could gel!

Only hot hide glue will do for a repair like this. Even clamping pressure is key.
From the initial dry fit to the actual glue-up, this patch-plug was a star patient, and we’re quite happy to report that everything fits snugly, and the plug sits just slightly proud of the surrounding spruce.
The plug ended up just proud of the top so it can be sanded down to level.
Next on the docket? Sanding the plug flush to the top, then levelling the entire surface under the bridge. This last step is crucial and delicate: without a consistent gluing surface to attach to, the bridge will invariably pull up again.
As the work progresses and we get closer to refitting the bridge and restringing this Holy Grail Martin to its former glory, we’ll post more photos with each swipe of the sandpaper. We’re getting very close to hearing what it sounds like to right the wrong of that gruesome earlier repair! Dream Guitars’ owner Paul Heumiller’s ears will be the true test, once he compares the choked chords of the first time he strummed this OM-45 to its newly-restored self.